6 Best Ways to Make Money by Going Green

6 Best Ways to Make Money by Going Green
There are loads of ways you can save by reducing, reusing, and recycling. Virtually ever time you do one of these, you are saving. In this guide we list the 6 best ways to be more environmentally friendly and make money or get freebies. Save the pounds and the planet in one go, win win.
1. Up to 50p off hot drinks with reusable cups
This one is close to my heart which is why I’ve put it first. The cheaky drink from a cafe or coffee shop is one of those pleasures we all indulge in from time to time and for many, it is how they start their work day. The cost soon adds up, as do those disposable cups, so what would you say if I told you, you can get money off that next hot drink if you take your own cup? Many stores will accept any brand cup as long as it has a lid and fits in a coffee machine. If you don’t already own a reusable cup, the cheapest way is to buy a £1 cup at starbucks but my favourite travel mug is the Kambukka Etna as it keeps my coffee nice and hot (or my ice coffee cold) and the lid “locks” shut so I don’t have any accidental spillages.
Pret a Manger has the best offer at the moment with 50p off, but you can get 30p off at Starbucks, 25p off and Costa and many smaller indepents are doing deals. You can use the free Refil app to find places offering discounts and rewards for bringing your own cup.
2. Sell Your Unwanted Goods
I won’t talk about selling your old phone, everyone knows you can do that, right? But did you know can sell pretty much anything, even things you might class as rubbish, like old jam jars or corks. As long as someone can find a use for them then they will buy them. The easiest way to find out if you can sell something is by checking what’s been sold recently on classified add sites.
Finding a new home for your cast-offs is not only environmentally friendly but can make you some serious cash and give you a nice warm feeling. I replaced an old wooden floor and managed to sell it for £582, it was nice to have the cash to help pay for the new floor but it was also great to pass it onto the new people knowing that it would continue to be used.
There are many sites out there, and you might need to look around to find the best one for selling your particular item. The ones I’ve used that cover most items are Gumtree and eBay.
3. Get Vouchers from Shops for Recycling
Shops are seeing the trend to be more green and they are getting in on the act. This works for them as there is money to be saved in reducing their waste but it also promotes shopper loyalty and keeps us going back to them. It is worth looking around for deals as there are several retailers offering freebies and discounts, here are the top selection we have found. Let us know in the comments if you find others.
Clothes and textiles
- H&M: £5 voucher for any clothes and textiles. Their garment collection programme has been running globally since 2013 and they have been doing a lot around improving their sustainability.
- Monki: 10% voucher for any clothes and textiles. Another retailer doing great steps in sustainability with their “Planet Power” project.
- M&S: £5 voucher for recycling their clothes at Oxfam.
Containers
- Kiehl’s: Points towards a £10 voucher when you return you empty Kiehl’s products.
- Boots: 500 points when you return five empty containers.
- & Other Stories: yes that is a strange name but they are big on sustainability and offer a 10% voucher when you return one or more of their empty containers. You can also get a 10% voucher for returning a bag of any clothes and textiles.
Plastic Bottles
This is a bit niche but if you live in the right areas you can make use of this. Iceland, Sainsbury’s, and Lidl are running trials in some of their stores where they will give you a 5-10p voucher for every plastic bottle you return. This isn’t being run in all their stores so check out the links to see if you are lucky enough to be able to make use of this.
Plastic carrier bags
We can’t all be like this lady and create clothes out of carrier bags so for us mere mortals our best option to make money from carrier bags is sell them back to the shops.
- Ocado: 10p for its own bags
- Morrisons: 10p for its own bags
4. Refill your water bottle for free
Water should be free, right? So why is it in this list? Although we have easy access to water in the UK we still use 36 million plastic bottles every day! The Refill scheme is trying to change this. Their Refil app lists over 30,000 location where you can fill up your own bottle or flask, even if you’re not a customer. I’ve always got my Camelbak Eddy+ in my backpack but there are plenty of other water bottles out there that will suit your needs. Just avoid buying disposable plasic bottles.
5. Get free food and fight food waste
Household food waste is bad but compercial food waste is so much worse and it is one of the biggest sources of emissions. The great news is that you can help reduce this and get free food at the same time. The OLIO app started off as a way to share food they don’t need and now has deals with the likes of Costa, Tesco, and Pret a Manger to collect their surplus. Everything on this app is free and it is super easy to use.
Another app to mention is To Good To Go, the “magic bags” of surplus food available through this app are sold at a hugely discounted price. There are loads of restaurants and shops to choose from so you’ll probably find some of your favourites in the list.
With both these apps, things tend to go fast so keep an eye on your favourites.
6. Furnish your house with free stuff
Giveaway sites are a great way to save cash and pickup some free things. You’d be suprised what you can find with the listings covering a wide selection of things. Freecycle and Freegle are the big names amd they are free-to-join. Much like the free food apps, it is your responsibilty to keep an eye out for new freebies and they go quick.
How to make seed bombs
How to make seed bombs
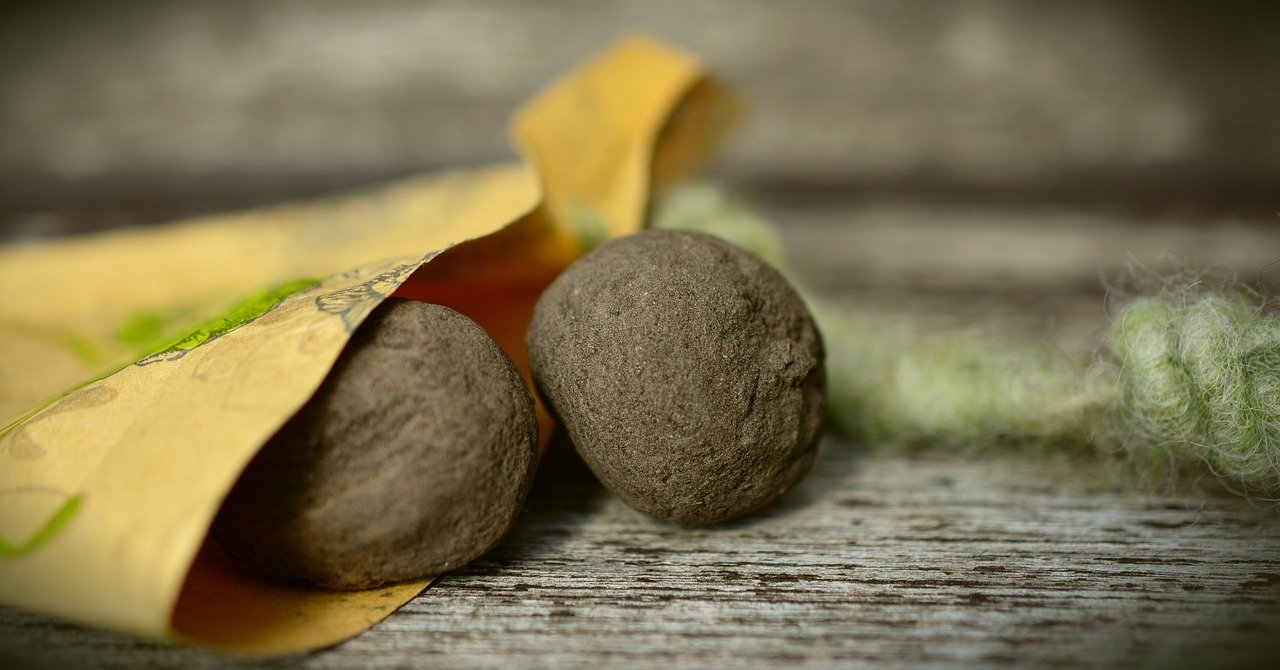
Seed bombs are great fun and are an easy way to sow wildflowers in your garden to attract all those lovely creatures.
While researching how to create a wildflower meadow I stumbled across the concept of seed bombs. They offer about the same germination success as hand spreading the seeds but their appeal is in the fun they bring. They also make it easier to get the seeds into hard to reach areas – provided your aim is up to it.
Seed bombs make great gifts and are a fun activity for the young and old. Seed bombing gardening projects can also be therapeutic and rewarding.
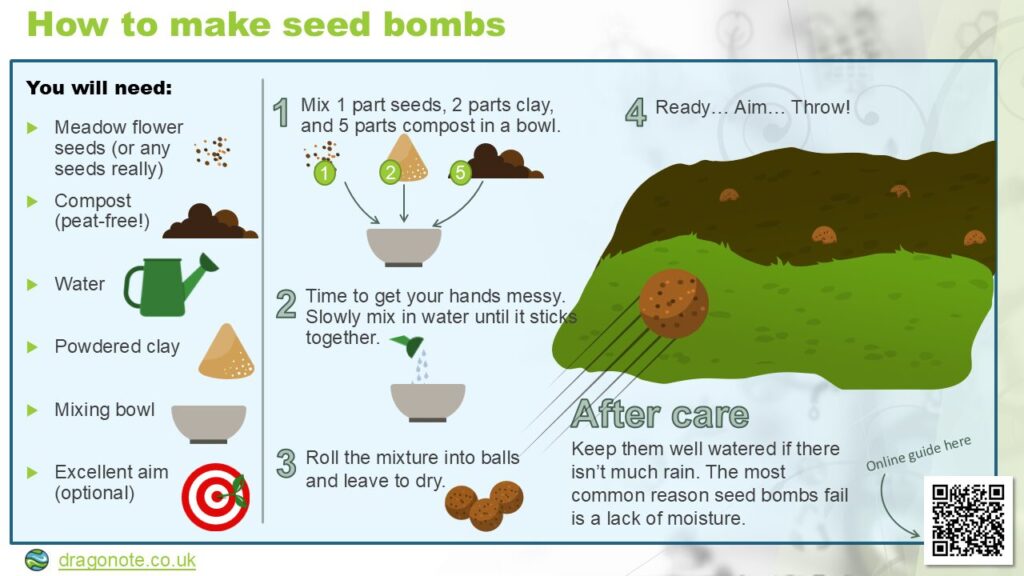
You can, of course, buy ready-made seed bombs but seed bombs are really easy to make so why not give it a go, I’ve even created a poster you can go through with your kids:
What you’ll need to create your seed bomb
- Seeds – these could have been collected from your garden or a seed mix you’ve bought.
- Peat-free Compost – you can always use your own compost.
- Powdered clay – you can find this in arts and crafts shops or if you have clay soil you can make do with that.
- Bowl
- Water
If you don’t already own some of the ingredients you can get a wildflower bee bomb kit that will provide everything except the water.
Method
- Mix 1 part seed, 2 parts clay, and 5 parts compost in the bowl.
- Slowly add water and mix with your hands. You don’t need the mixture really wet, just enough to stick it all together.
- Form the seed bomb mixture into firm balls (or whatever shape you fancy). My kids wanted to make different shapes so we pressed them into molds.
- Leave the mixture to dry.
Using your seed bombs
If your seed bombs are destined for others in the form of a gift then there is no more to do except prepare the gift, they will last longest if kept in a cool, dark dry place.
If on the other hand, you are keeping the fun for yourself, then the best time to throw your bombs is just before some rain, to give the seeds a good start – obviously, you can manually make it “rain” by grabbing a watering can or hose.
Throwing the seed bombs adds a nice bit of random – especially with my aim – which makes the resulting flowers look more natural but as a rough guild, you’ll need about 1 seed bomb per sq foot.
In the first few weeks make sure the seed bombs don’t dry out and then you should see seedlings within 2 to 3 weeks and flowers within 12 weeks.
3 easy steps to create a wildflower meadow
3 easy steps to create a bee-friendly wildflower meadow
Whatever your budget or meadow size, discover some easy steps to create a bee-friendly wildflower meadow and then keep it coming back year after year.
Do you love wildlife, want an easier life, and have a patch of garden in an open, sunny place? Then turn it into a wildflower meadow, it provides cover and food for wildlife, interest and colour from spring to the end of summer with all the wildflowers, and requires far less maintenance than a traditional lawn – yes you can put away that mower for most of the year and never apply lawn feed again!
You don’t need to convert a whole area, a wildflower meadow can exist next to a traditional law so the kids can still kick a ball about. Whatever the space you have, opening your garden to butterflies, dragonflies, bees, grasshoppers, and hedgehogs (just to name a few) helps your local biodiversity and gives you a wonderful space to spend time in – just imagine the soft grass under your feet and the peaceful sound of buzzing bees with the backdrop of butterflies flitting from flower to flower; doesn’t that sound idyllic?
Wildflower meadows like it rough
A little surprisingly, wildflowers require poor soil to thrive. If the soil is too nutritious then they are going to be swamped by other plants, especially vigorous grasses. A way to control the grasses and give your wildflowers a chance is by planting some Yellow Rattle. This is an essential meadow flower as its beauty hides a sinister (but useful) character. The Yellow Rattle’s roots tap into grasses and steal their nutrients, suppressing the grasses and therefore give more room for the bee-friendly wildflowers. It does such a good job that it is sometimes called “the meadow maker”. If it’s not already in your meadow mix then it can be added by sowing fresh seeds in the autumn (it requires temperatures below 5°C to germinate).
Step 1 – Choose the patch for your wildflower meadow
Before you get to work on your wildflower meadow and start welcoming all those lovely pollinators, like the bees, you need to decide where to make it. One of the first things to consider is the light and soil type. All meadow plants prefer open sunny spots with dry soil – damp soils will be ok but avoid extremely wet sites – so pick the positioning wisely. As well as the dampness of the soil it is worth considering whether your soil is Limey, Neutral, or Acidic as this will determine which flowers will grow best.
Step 2 – Choose the way to add the wildflowers
There are 4 main ways to establish wildflowers and rather nicely, 2 of them are best for lawns and 2 are best for bare soil.
Best for adding to existing lawns
- Say no to the mow – the “No Mow May” project was started to help bees and other insects, but leaving your lawn unmown for even longer and cutting it in the autumn can be the easiest way to establish a meadow. It will take several years but you’ll be suprised what can come up. You can always combine this with some of the options below to speed up the process.
- Plug plants – wildflower plugs can be added straight to an existing lawn and although they can again be planted almost anytime of the year it is best to plant them in spring of autumn. They are prone to slug and snail grazing so use some form of control such as egg shells. Here is how to plan the plugs:
- Cut the lawn nice and short and remove all the clippings to prevent nutrients being returned to the soil.
- Make holes about 15cm deep and 5cm wide. For a natural look, arrange the plugs in groups of 3-5 across the lawn.
- Water immediately. In the first six weeks they may require additional watering if there is a dry weather spell.
- For the first year keep the vegetation immediately surrounding the plugs short.
Best for adding to bare soil
Technically this can still be done within an existing lawn, you just need to take out sections of the lawn.
- Wildflower turf – if you want to cover a small area and want a low hassle solution this is a good option. The turf has the right mix of grass and wildflowers, all you have to do is clear the space as you would for any turf and then lay your new wildflower meadow. This method of meadow making can be done almost any time of the year but due to complications with moving the turf when in flower it is still recommended to do during spring or autumn.
- From seed – Seeds can be sown indoors to make your own plug plants (which can be added to an existing lawn) or driectly outdoor. You’ll need 4g-15g of seeds per square metre and check your seeds come from suppliers that source native British plants.
- Sowing outdoors: The best time to sow outdoors is August and September but it can go into October or the spring provided the ground is unlikely to freeze in the following weeks. It is best to sow seeds on bare ground (so not straight to a lawn) and if the ground is likely to be nutrient rich you might consider removing the top layer of soil. If you want to have a bit of fun while sowing the seeds try seed bombs.
Wildlife Watch have a nice info graphic to help: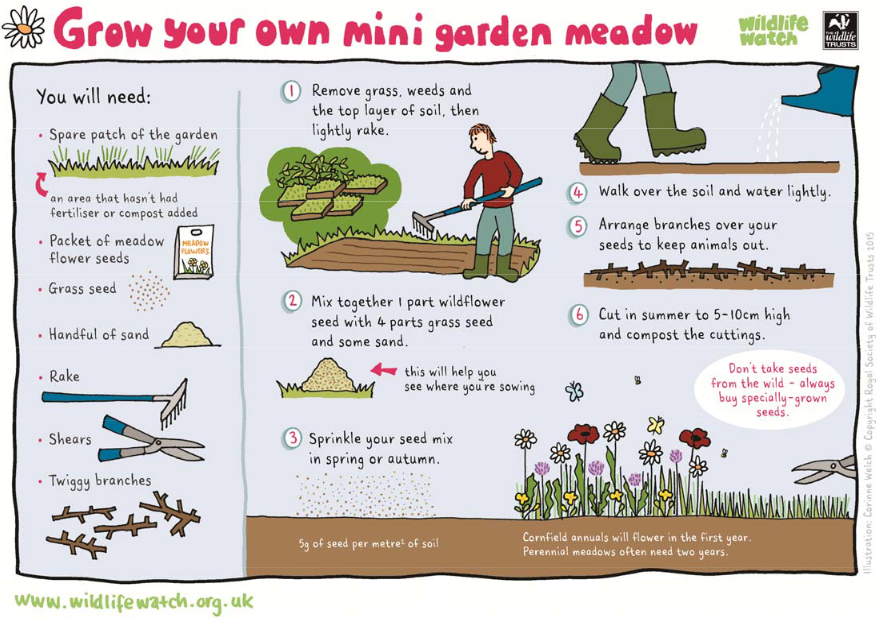
- Sowing outdoors: The best time to sow outdoors is August and September but it can go into October or the spring provided the ground is unlikely to freeze in the following weeks. It is best to sow seeds on bare ground (so not straight to a lawn) and if the ground is likely to be nutrient rich you might consider removing the top layer of soil. If you want to have a bit of fun while sowing the seeds try seed bombs.
Step 3 – Maintain your wildflower meadow
Once you’ve established your meadow with some wildflowers and grass, the maintenance is really easy. The basic pattern is to cut the meadow at the end of summer after most of the wildflowers have had a chance to seed, then again in the spring – that’s it, just two mowings!
As the grass will be tall you’ll need to use a strimmer or a scythe for the more adventurous. Remove all the cuttings to prevent the nutrients from returning to the soil and add them to your compost. If you add it to your main compost you might find wildflowers appearing all over your garden!
Advanced option
Not really that advanced. When you do the end of summer cut put the grass in rows and turn daily for around a week. This allows the seeds trapped in pods to escape. You can also move the cuttings to different areas of your meadow to spread the flowers.
I hope you enjoy your meadow, I’d love to hear about your experience in the comments.
How to compost eggshells
How to compost eggshells
Learn the right way to compost eggshells to get the most out of them that gets you free nutrients for your plants and free pest control
During the pandemic, more people than ever are saving grass cuttings and kitchen scraps for their compost bins and turning them into the “black gold” also known as compost. The benefits are huge, but for the uninitiated, it can seem daunting. The truth is it doesn’t have to be difficult and just following this basic “recipe” for compost gets you great results:
- 1-2 parts Greens – wet/fresh ingredients such as fruit & vegetable scraps, fresh grass, coffee grounds, tea leaves (don’t use tea bags unless you know they don’t have plastic in them).
- 3 parts Browns – dry ingredients such as shredded newspaper, dried leaves, dried grass, cardboard, or straw.
This mix is very flexible, you really can’t go wrong just keep it in mind as you’re adding things to your compost. I keep a box of dry ingredients next to the compost so I can add a couple of hand fulls whenever I chuck in the wet stuff.
What’s the best way to compost eggshells?
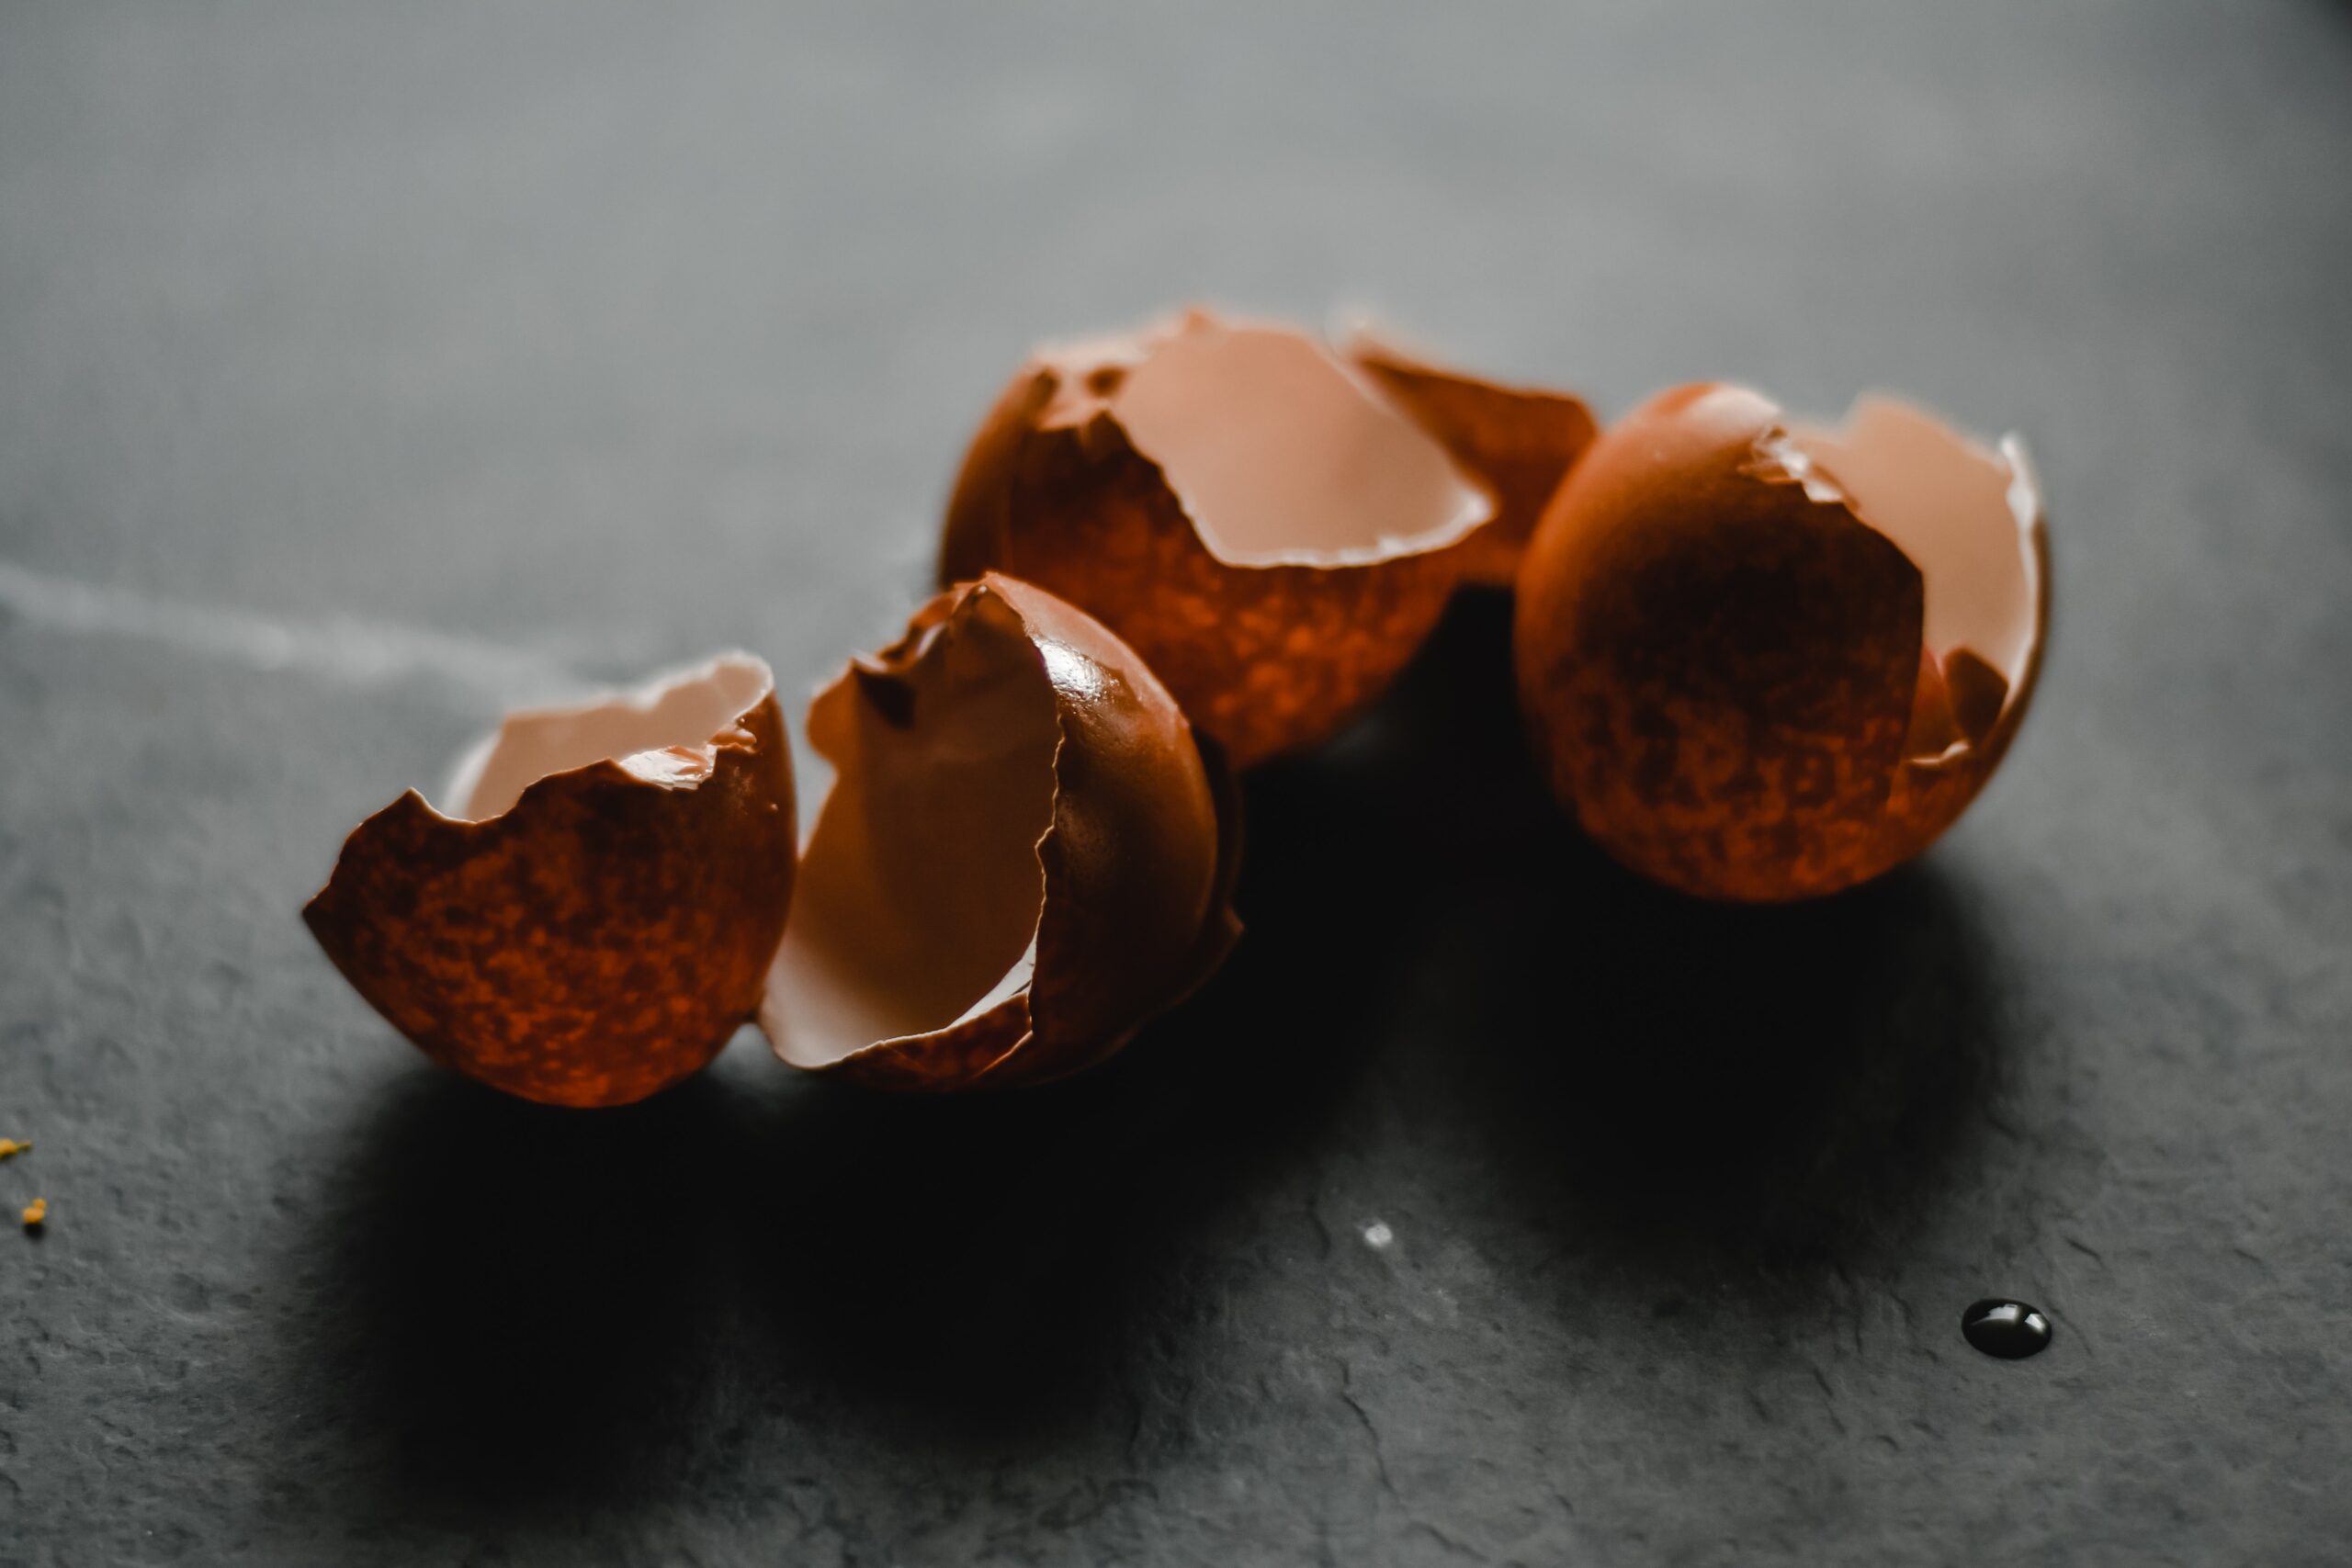
Eggshells go into my top 5 best things to compost, they are a great source of calcium and can be sprinkled directly on the soil for slug and snail control.
Eggshells however will take years to break down if you just throw them on the compost without a little bit of prep. These are the steps I follow:
- Give the eggshells a little wash – this isn’t critical but leaving them unwashed can attract unwelcome vermin and when washed they are easier to break up.
- Put the eggshells in an oven try and bake for 10 mins. – I just throw them in the oven when I’m baking something else so I’m not wasting energy.
- Once the eggshells have cooled then blitz them into a fine powder in a blender or mortar and pestle – if using for pest control aim for small sharp pieces instead of a fine powder.
- Add to the compost heap or or directly to the soil. – eggshells are particularly good for tomato plants with blossom end rot.
You can break the eggshells up without baking them first but the baking step makes it easier. When broken up the eggshells will be absorbed almost immediately rather than taking years to break down.
Other composting tips for beginners
- Mix the different materials, for example don’t chuck a huge bag of grass cuttings in one go.
- Don’t put meat, fish, or dairy into the compost head, this will help you avoid attracting rats. Another tip is to turn the heap regularly, it provides air to the compost to stop it smelling and will detter rats.
- If you don’t have a garden try a wormery instead. This is a stacking system of trays that you can buy ready made or have a go at making your own worm composter.
- I forget to actually use the compost so try locating the bin near your growing area.
- You need some moisture in the compost which shouldn’t be a problem as most green materials have loads of moisture but if you find your compost is getting a little dry then try soaking your cardboard/paper before you add it.
- Lastly don’t fret, you’re compost is very forgiving. If you don’t get the ratios quite right you’ll still end up with compost, it just might take a little longer.
How to make your own beeswax wraps
How to make your own beeswax wraps
Following on from my Plastic Free July I focused my attention on ridding our use of cling film. Beeswax wraps are a great choice for replacing this plastic wrap. These homemade food wraps are reusable and very quick to make.
Why is cling film so bad?
Cling film is brilliant at keeping food fresh but it is a very big contributor to the plastic pollution crisis. It is made from a variety of plastics which makes it extremely difficult to recycle. Meaning it usually ends up in the landfill and in our oceans adding to the 381 million tonnes in plastic waste we create yearly. Added to that there has long been concern surrounding the leaching of chemicals from the plastic into our food and drink. Cling film is not immune from this concern:
“New evidence suggests that heat makes chemicals in plastic storage boxes and bottles leach into food and drink: two major reports last year linked 175 compounds to health problems connected to cancers, fertility and foetal development.
Even Cancer Research UK, which has so far been sceptical, is now warning that cling film should not be allowed to touch the food it is covering during microwaving.”
MailOnline
This is a bit sensationalized and there are doubts it is as bad as the article makes out. For example the BBC has run some tests to see if they could detect the leaching, the results of which showed that it is safe to use cling film even in the microwave but if there are other non-toxic options that don’t add to our plastic problem, why not make the change. This is where beeswax wraps coming.
What are beeswax wraps?
Simple, they are some fabric coated in wax that make an amazing reusable food wrap. They can be used for bowl covers and to wrap food like sandwiches, fruit, really any solid food. You can buy beeswax wraps of course, and there are plenty of great options available:
But if you are anything like me you’d look at something and go – “I can make that!”. Beeswax wraps couldn’t be easier, they are just pieces of cloth that have been infused with natural beeswax. So not only do you get to the exact size, style and have the satisfaction that comes from making your own stuff, you’ll also save money with these homemade beeswax wraps.
How to make DIY beeswax wraps
Here are the supplies you’ll need to make homemade beeswax wraps:
- Fabric scraps – use whatever you have but I recommend a light to medium weight and 100% cotton.
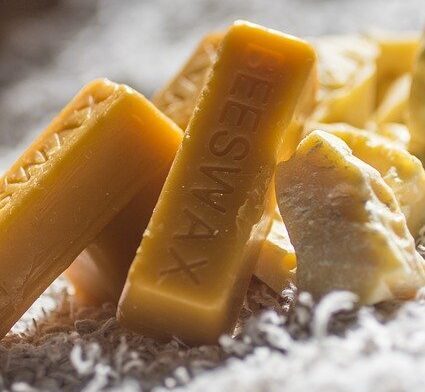
- Sustainably sourced beeswax (pure or cosmetic grade) – you can grate a bar of beeswax or use beeswax pellets
- Scissors – Pinking shears if you have the as they cut zigzags and reduces fraying but no problem
- Iron
- Baking paper
- Start out by cutting the fabric to the desired shape and size, then lie it flat on a sheet of baking paper on top of a heat-resistant surface – ironing board or thick towel. Make sure the baking paper is bigger than the fabric or bee really careful when heating and spreading the wax to the edge.
- Next grate or sprinkle a thin, even layer of beeswax over the fabric. Cover the beeswax with another piece of baking paper.
- Heat an iron on a wool setting, around 150°C.
- Gently iron over the top sheet, melting the beeswax into the fabric and use the iron to push the wax to the edges. If there are any gaps, add a little more wax and iron.
- Leave your newly created beeswax wrap to cool then peel off the paper. Remove any excess wax and reuse for the next wrap or project.
- To use, make sure your food is cool and then wrap. The warm air or the warmth of your hands makes the beeswax pliable and gives it sticking power.
How to care for you DIY beeswax wraps
Beeswax wraps can be washed carefully in cold water and left to dry – don’t use hot water and don’t scrub as both will remove the beeswax.
If you take good care of your beeswax wraps they will last 6 months to a year and can be refreshed by adding more beeswax when they start losing their sticking power.

